E X P E R I M E N T I N G W I T H W I D E A N G L E L E N S E S
I wanted to experiment and expand my knowledge on different lenses for the Canon DSLRs and from past projects, I have only used the zoom 18-55mm lenses when it came to filming for my advertisements, documentary and scene recreations. I have had enough practice on the zoom lenses therefore, I wanted to try create new and different type of shots that I have not yet experimented. I went to the technicians and asked if there are any other lenses apart from the zoom lenses and they had introduced me to the wide angle lenses and wide angles lenses are able to put into frame anything that is wider than 50mm in which is a full frame. Wide angle lenses see a view that is wider than what the human eye sees and wide angle lenses allow objects that are close and within the shot to appear much larger than the other objects in it's surroundings although in reality, the objects in the surroundings and the object that is being focused on are the same size.
E X P E R I M E N T I N G W I T H C I N E M A T I C F I L M M A K I N G
E X P E R I M E N T I N G W I T H A M B I E N T L I G H T I N G & C O L O U R G E L S
I have taken the wide angle lenses out with my friend and I wanted us to be able to experiment in trying to create good experimental shots using the wide angle lenses. As I have not really researched a lot about the wide angle lenses or researched any infamous wide angle shots for us to trying and recreate, we had decided to go out and attempt to create good shots although it was not a good idea to experiment without researching how to use a wide angle lenses or having a variety of shots taken from online for us to use as inspiration or a guide in recreating a particular shot. The four videos above are shots that we had taken using the wide angle lenses and I would say that some it was a good experimental shoot as I really like some of the videos we took. What I liked and what I thought was quite strong about the first video is that having the camera at a very low almost at feet level and having it slightly at a low angle in which will make an object appear more larger than usual and increase height. Low angles usually represent and signify a character or an object having the upper power and dominance if there are other characters hence why low angles are specifically used in situations where a character may be dominated physically, mentally or even psychologically by another character. Low angles may also empower feelings of fear among the audience and this could be useful for me if I happen to produce a short film as these low angles will help indicate a character's feelings of timidity and insecurity in which insecurity is one of the main themes of LGBT as many people from the LGBT community feel insecure about opening their feelings or even talking about how they feel. Moreover, in the shot as I am walking away from the camera, my body appears more further away and smaller if I were to compare this very same shot but filmed on a zoom 18-55mm lense, the wide angle shot would catch more of the environment within the frame but the normal zoom lense will only have a limited amount of the environment within the shot however, I like how the shot had turned out and I definitely would use the wide angle for my short film as having a shot where a character appears smaller can symbolically represent the character's emotions of feelings as feeling small is associated with LGBT since people that are a part of the LGBT must have experienced feeling small and insignificant due to people not accepting them for who they are and what their sexuality is hence why it would be useful and practical for me to use the wide angle lense to imply a symbolic message towards my audience.
P O D C A S T E X P E R I M E N T
This is a two minutes sample from my 27 minutes 4th podcast experimental session and in this podcast conversation, I am speaking with a friend in detail about feminism in gaming. The conversation that we had spoken about include how the gaming industry does not have a wide diversity of female portrayal when it comes to body image and also how games portray women as objects and prizes. I personally think that this podcast session was not the best experiment compared to the other podcast experiments I have done as in this session, I was not as lively and I kept stuttering and forgetting what words to use and it did not sound very good therefore, I will not use this experimental podcast session for my online blog. Another negative feature on this particular experiment was that the conversation was not at all flowing as there would be parts where both the parties that are speaking are quiet and it sounds very awkward and when I was planning and noting down what I must and must not do during the podcast is allow an awkward silence to occur but for this session, it had occurred quite a handful of times in which does not make this piece of work strong. Another thing that I did not like about this podcast experiment was that sometimes the person whom I am discussing feminism with completely goes out of topic of the issue of feminism in gaming industry and only speaks about the game itself and characters in the game and that is not my intentions for the podcast as my podcasts are meant to be about the actual games but the issue within the games hence why this session is too weak to be able to use for my candid feminist blog. This podcast session would not be as interesting or fascinating to my audience whom really wish to learn abut how the gaming industry renders feminist ideas as we did not discuss these issues for a long duration of time. However, a positive remark I can say about this podcast is that we both addressed the issues of feminism in gaming and we were able to talk about them for about 10 minutes throughout the podcast and we both gave our sides and arguments as to what we think about the issues of feminism in particular games but as this podcast was around 27 minutes, 10 minutes of discussing the significant matter of the representation of women and men is not enough time. I definitely could have improved this podcast if I were to plan and note down what subject matters me and the participant will be speaking about and inform them that these are the subjects that we should only speak about on the podcast. I can conclude that this podcast audio will not be edited for improvements an it will also not be posted on my online blog.
S E T T I N G U P M Y O N L I N E B L O G


SETTING UP MY WORDPRESS BLOG:
From researching which blogging platform online is best to use when setting up an online blog and from researching many platforms, WordPress has won over the other platforms such as Tumblr, Blogger and Wix. When I have begun signing up on WordPress, it was very quick to sign up and set up my online blog such as the domain name however, it took me quite a long time to choose a theme layout for my online blog as there were not as many themes to choose from and from my research, I had read that WordPress has a great variety of different themes and layouts however, in my experience there was only one page of themes and the free themes that were given to me to choose from were not something I would use for my blog however, I ended up choosing a theme that I am what I would say "okay" with however, I was not fully pleased with my theme. After I have chosen

my theme, I wanted to customise my site to see if I am able to change the layout to the way I would like it to appear however, I found it quite difficult searching for how I can customise my site and although it may sound easy and obvious as to where it is where I must click to customise, however the way WordPress lays out our site details, it is very confusing for a starter on WordPress and from reading online about other users' reviews on WordPress, it was not as truthful as they had stated that it was easy to work with as a beginner blogger but I disagree completely as I had a very hard time trying to figure out how to work WordPress and figure out how to simply customise my own blog site. Although I had quite a few troubles in the start of using WordPress, I decided
to continue using it and see what else WordPress can do to help me set up my candid feminist blog however, it seems that my experiences with WordPress do not get better but only get worse as in attempting to change my blog header rather than using the default photo that the WordPress theme layout I have chosen has automatically given, I decided to quickly make a simple header to use for my blog. I made this simple banner on Adobe Photoshop and I did was create a new A4 International paper page and I had turned the

JPEG, I uploaded it on to WordPress to change my banner however, when I uploaded it, WordPress was not allowing me to view it and the image did not appear on the media library at all. I attempted to re upload the banner a couple more times but it was useless as it still did not appear on the library which was very odd. As I was using Google Chrome, I decided to try uploading the image on WordPress using Safari in case Google Chrome was malfunctioning and having technical difficulties. I tried uploading the banner using Safari and yet again, it was hopeless and it still did not appear on the media library and I was beginning to get very agitated with using WordPress as it seemed to be through my experience that WordPress was not as good as it was meant to be according to the reviews I have read. From my bad and negative experiences with WordPress, I do not want to continue and pursue using this online blogging platform anymore as it is quite complex to use for a beginner and I do not want to use a blogging platform that does not upload my work and it would then consequence of my work not being able to get marked if my work is not published on an online blog.

page 90 degrees clockwise so that the page would be landscape rather than portrait. Furthermore, I chose a colour that to me reminded me of feminism and the colour I chose to use for my header is a pinky peach colour. I chose this colour because the colour of pink and peach mixed together prompts me to think of both men and women and feminism is all about supporting equality between both men and women and I think this colour is the perfect colour theme for my online feminist blog. Once I have finished producing my candid feminist blog banner and exporting it as a
SETTING UP MY WIX CANDID FEMINIST BLOG:
As I did not want to use Tumblr as my alternative blogging platform choice due my experience with Tumblr in the past, I had decided to use the one blogging platform that I have been using for a while and the one blogging platform that I use everyday: Wix. To me, Wix is very easy to use as I have used this for almost 2 years due to my course and I have grown to be used to how Wix works and I have a lot of knowledge on how to customise my blog, how edit particular text or images and how to adjust my layout which is exactly what I was originally looking for when I was researching for a blogging platform to use. Before, I did not want to use a platform that I am aware of suh as Tumblr and Wix because I wanted to be able to learn new information on other blogs and be able to discover for myself how to work my blog however, although I was very enthuastic when it came to learning how to set up my blog on a new blogging platform, I decided to use Wix since they have a huge amount of different yet great themes and layouts to a point where it is difficult for me to make to a conclusion on which layout I wish to use for my blog however, this kind of crisis is a situation I do not mind at all

undergoing as Wix has reached my high expectations. I choose a nice simple yet vintage looking layout as I think that a blog that appear sophisticatedly simple is physically pleasing to the eyes. I did not go through any
undergoing as Wix has reached my high expectations. I choose a nice simple yet vintage looking layout as I think that a blog that appear sophisticatedly
simple is physically pleasing to the eyes. With the layout I have chosen, I am not quite used to the layout as I am given the opportunity to manage the posts that I published on my blog and I am able to sort the articles I post into categories but I really do admire how the layout is et up as this allows my blog to appear similar to famous online blogs and I have control on where particular posts should be placed.
This is a three minutes sample from my 25 minutes 2nd podcast experimental session. In this podcast session, me and another participant are discussing many sub topics of feminism such as the history of feminism in which include the first wave, second wave and the third wave of feminism, we had also discussed how feminism relates to religion with Islam and other issues that are political. A strength about this podcast is that the subjects that we had explored were discussed in full detail which I really like because having a full detailed discussion about each topic as this would be beneficial for my audience and the readers of my online blog since this would be educational information given to them. Furthermore, I think it was a good move to speak about religion and feminism as some of my audience may be religious or a part of a religion and in this podcast, we are discussing the religion of Islam in particular and my audience is mostly aimed towards teenagers or young adults and there is a high chance that some may be Islamic and this podcast gives them the opportunity to hear another person's Islamic views on feminism and this could be very educating to them and they can gain some knowledge on Islam. This experiment also explores the history of feminism and this could be another useful attribute for the audience since this is another given chance to learn some new information about the past and how feminism had arisen and how feminist movements had surfaced. Talking about the history of feminism can attract a part of my target audience that have an appeal towards history and learning the history of feminism allows my audience to gain a better understanding about the changes that have occurred in the past and how the past had helped the world and society to be how it is now. Moreover, the reason why I wish to use this audio for my online blog is because we did not at all stutter with our words or have an awkward silence and that are two features in which are significant to me when it comes to a podcast and I did not go through any technical difficulties or any problems with our communication as it went very well throughout the conversational session and I think that my target audience or readers of my blog will enjoy listening to our podcast together and will be interested in our conversation as the way we are speaking sounds very passionate about the subject and also, we sound very energetic about the debate of feminism in a social or political way. Although there are many good and constructive attributes to this podcast session, there are some improvements that must be improved, one of those things are to bleep out any swear words that were said in the session as since I am aiming towards a younger audience and a audience of young adults however, there are pros and cons to bleeping out swear words: I think that keeping the swear words in my podcast would be safe to use as my target audience are at the age in which they were brought up in a world where swear words are considered a norm compared to the people whom are quite older whom see swear words as slurs. On the other hand, bleeping out the swear words for the podcast will not allow my younger audience to hear any swear words or promote profanity and socially offensive words as some of my target audience may become offended or upset about the use of swear words however, I do not think that the swear words used in my podcast were used in an insulting or affront way hence why it may be okay to not bleep the swear words out.
This is a four minutes sample from my 15 minutes 3rd podcast experimental session. This was another one of the podcast experiments that were not as great as I had expected it to turn out. The problem with this podcast is that it sounds like an interview rather than a podcast and this is because the communication between me and my friend whom is participating in this podcast pauses for a few seconds after I ask a question or discuss a specific topic and then she begins to answer or continue the conversation and I don't think the conversation is flowing as smoothly as podcasts are supposed to sound like and the communication between us is lacking since it sounds as if the person I am speaking is quite bored at particular parts of the podcast. I think I could have improved this podcast by prepping my partner in the podcast on how podcasts are in which is a normal conversation and it is not at all like an interview where one speaks and the other keeps quiet until it is their turn to speak. Reminding the participant to speak casually and normally to me like a friend to friend conversation may have positively made this podcast better and it would have been good enough to edit and amplify to post on my online blog. However, when a good topic that interests my friend is brought up, our discussion and our communication becomes more better and smoothly. I have noticed that when we both find a topic that we are both passionate about and in this case, it is about how women aren't given as much opportunities in society whether it is in a social matter or political matter and we both shared the same thoughts on how society do not treat women as equally to men as men receive more chances to make changes or have a specific job but women do not get the same chance for the same. To conclude, I don't think that this podcast audio session is good enough for me to edit on Adobe Audition since throughout the conversation, my participant did not sound lively enough and this may jeopardise my audience's interest in listening as no one would like to listen to a podcast of 15 minutes to listen to a boring conversation and a person discussing an important topic but sounds quite unbothered therefore, I think that it is safe to say that this will not be posted and published on my online blog.
TITLE OF PODCAST WITH WURA:
DISCUSSION OF FEMINISM IN DISNEY, THE JAMES BOND FRANCHISE, THE WAVES OF FEMINISM, RELIGION ETC.
DESCRIPTION OF PODCAST SESSION WITH WURA:
In today's Candid Feminist podcast session, Wuraola Olagunju and I talk over the broad topic of feminism and other related subjects of the matter. Feminism has been a long journey for women since we've endured violence, inequality and discrimination throughout history by the world but now times have changed but have they really? Do women really get equal pay as to men? Do mainstream films still follow gender role stereotypes compared to the films that were made in times where traditional views were still accepted? If you are interested in knowing more about feminism in films, we explore on how Hollywood films represent women back then and how they represent them now but a good question to ask is "Is there a difference to how a woman is portrayed in film compared to how a man is portrayed?" This is a question I like to ask as it sparks a conversation and a debate but that's a question I want you as my readers to contemplate in your head. If you are interested in history, we go back in time of the first wave of feminism in the late 19th century and the early 20th century to talk about how feminist movements had begun arising and the violent response of authorities, moreover, travelling to the second wave during the 60's and 70's where the Feminine Mystique had become a popular book that sparked the second wave to surface in the UK and the USA. In this 30 minute podcast session, listen to the discussion of the development of feminist ideas and issues that are still addressed to this present day.

EDITED PODCAST SESSION WITH WURA: USING THE RADIO ANNOUNCER EFFECT
This is the final edited version of my podcast with my friend Wura that will be posted on my online blog. The original audio of my podcast was around the duration of 35 minutes but I had cut down the audio to only to 28 minutes as during the podcast session in real time, there were some parts where the participant of the podcast and I were quite silent for a few seconds until we had found another topic within feminism to talk about therefore, I had used the editing platform Adobe Audition in which is an editing programme where I can edit audio files and sounds. At first, I had not heard of this editing programme therefore, I had originally opened Adobe Premiere or Audacity in order to edit my audio altogether however, from researching online other sound editing platforms, I had discovered Adobe Audition and decided to begin experimenting on this. At first, it was very difficult to work on as I have no knowledge or awareness on how to edit on Audition and this had led to me researching online on how to use Adobe Audition for beginners and I had found some interesting and helpful tutorials on YouTube to help me learn how to edit audio this programme. Moreover, from the tutorials I have watched, I had also learned that Adobe Audition has many audio effects such as on the telephone, an underwater effect and even a spooky effect but what had caught my eye was that Adobe audition had two effects that may be useful to use for my podcast audios and those effects were called "Podcast Voice" and "Radio Announcer". For my podcast, I want to edit them and make them sound as if it were a radio podcast and I think both these effects will give me that result however, when I had tested them both out on Audition, I originally thought that I was going to be more fond of the Podcast Voice effect but surprisingly, I preferred using the Radio Announcer effect as the Podcast Voice had a high amount of noise sound effects and it had enhanced the parts of my podcast where our voices were too close to the microphone and it did not sound good, on the other hand, the great thing with the Radio Announcer audio effect, it did not have much noise in the background and it had reduced the loud sounds where we spoke quite close to the microphone, although it can still be slightly heard, that sound is more quieter and it does not sound too ear piercing. However, when I attempted to upload the whole 28 minutes podcast session with Wura on to my Wix feminist online blog, it would not allow me to upload the full audio since it is 614MB and Wix can only upload 5MB, this had resulted in me re editing the audio but cutting the audio down into five separate audio files that reach to 5MB. I personally found it quite difficult to edit the audio into 5 files as I would some times miss a few seconds when I edit the next file and there would be missing clips from the original audio but I conquered this problem by measuring how long each five clips should be and get a specific duration time to cut out.


B L O G A R T I C L E S L A Y O U T & W R I T I N G S T Y L E S
I N S P I R A T I O N S


FEMINISTING.COM:
Feministing.com is an online blog that bases their articles and work on feminism. I really liked reading their articles as it was very articulately written as their vocabulary choices made sense yet sounded expressive in which is my favourite kind of writing styles when I read books and articles. With Feministing, their writers also write as if they are speaking to the readers and I think that is very effective in articles as it will create a bond between the writer and the readers and this will allow the audience/readers to feel more
engaged in reading the article so this will result in them feeling as if they are having a conversational discussion with the writer. This effect is something that I will aim for in my own online blog as with my blog, I want my target audience in which are young teenagers and young adults to be able to connect with me as a writer and as a fellow feminist as some of my target audience may have the same views as me an believe in the same beliefs I have when it comes to the issues of feminism and I think speaking in first person will allow my online blog articles to be more authoritative in which results in my readers building trust in me, the writer. However, something that I am not fond of in the Feministing.com articles is that they do not involved any photographs and the problem with not involving photographs is that it will allow my blog article to appear quite intimidating if there is a lot of text on my article and it will not motivate my readers to read my whole article and this will decrease their attention span to my blog. With my own online blog, I will write an article and I will write as much as I wish to but I will also involve photographs that I have taken myself or from the internet with sourcing the source I have used so that there are text and visuals for my blog, this will balance out their awareness on the text and photos. Feministing's articles are an inspiration to me when it comes to their writing style as their writing style is similar as to what I am aiming to use for my online blog and that is a casual and friendly writing style since it will match what my target audience may be interested in.
F O C U S G R O U P
"Hey Natalie thank you for emailing me i loved the blog and the podcasts i have the same problems that were being adressed and i feel like i can relate to what is being said. to improve add more posts but loved it." Mariam Shobowale, Second Year Media College Student
"OK so you should add pictures in that huge paragraph where the podcast videos are the text might make people not want to read it because its soooooooo long omg. And in the Podcast you should get a guy in there and get his opinion his on feminist maybe someone who is against them. because when you were talking about metal gear solid and how the half naked women was not realistic a guy would of defended by saying she is in the military and she has to be in top psychical shape and women do have naturally huge big boobs. i like the blog logo but it looks empty maybe add pictures of famous feminist women who had done a lot for women." Abdikarim Ali, Second Year Media College Student
"I like the layout its very aesthetically pleasing and simple, it easy to maneuver thorough. The font is easy to read and understand, I love how clear the podcast is. I can hear her and you clearly" Nasrin Miah, Second Year Media College Student
FEEDBACK RECEIVED BY SECOND YEAR MEDIA STUDENTS:
"I think your blog is really good. I like the layout and the colour scheme you used, I think it fits well with your topic about feminism and also i think the podcast is great addition to your blog because it allows you and interviewee to share your thoughts with the world. Only improvement i would give is to do more research but other than that I think its really good so far." Tevin, Second Year Media College Student
1 S T B L O G A R T I C L E
SUBJECT MATTER OF MY FIRST ARTICLE:
With my first article to be publish on my Candid Feminist online blog, I want my article to focus on the issue the sexism in the film industry, particularly focusing on female workers that work behind the screen. This subject will allow me to discuss how the issue is still ongoing from the past and to the current present as from researching and reading other articles, women had experienced sexism from the 70's even up until now. In addition to that, in my article, I can talk about how women are not given the same opportunities as men received when it comes to working the film industry as there are statistic that support this statement online, especially on Geena Davis' organisation site where she had conducted further research within the film industry and how there is a difference between the statistic of men and women employed in film. I think I can also fit in how my readers and I should always uphold equality between the sexes of men and women and to not treat each other differently due to being either a male or female as gender diversity will teach my readers to be taught different information and receive a different perspective from different people.
I have been using articles from Feministing.com to inspire me as I write my first few drafts of my article as from analysing the articles from Feministing.com, the writing styles that they use are very casual and have quite an informal writing style yet it is also very informative for the readers and audience in which is what I wish to do with my online blog articles. In my article, I want to mention a female director and I will be mentioning Lexi Alexander in particular as she is an oscar nominated director that has personally experienced sexism on set of a film and talking and discussing about her experience on my article can capture the attention of feminists that are passionate about equality of gender and also, this can catch the attention of film lovers or big fans of Lexi alexander films in my target audience.

1ST DRAFT OF MY BLOG ARTICLE:
G R O U P D I S C U S S I O N V I D E O
A B O U T F E M I N I S M I N T H E F I L M I N D U S T R Y

RESPONSE TO FOCUS GROUP FEEDBACK:
I have conducted a focus group to some of the second year media students and I had presented them a piece of my work that has already been uploaded on to my online blog. What I have presented to my class is an edit podcast session in which discusses the issues of feminism within films and games but also a discussion about the history of feminism. I had received quite a few feedback from my class peers of my podcast work and some of the feedback that I had received is that they really adore the layout and colour
scheme of my blog as the colour pink reminds of feminism and femininity and it works very well with my subject matter of feminism. I am really glad to hear this kind of feedback because my intentions of the colour scheme were to signify feminism and knowing that my class peers were able to detect my intentions reassures me that my online blog layout is a strong piece. Another response that I had gotten about my online site's layout is that it is easy to work and discover where my posts are published. I am also happy with this particular feedback as I wanted my online blog to have a simple and easy design as I did not want my target audience or my readers to have a difficult or challenging time attempting to look for my articles, podcasts or videos. Furthermore, I had also received feedback about my podcast and some have stated that the podcast audio can be clearly heard and both whom are speaking in the podcast are equally heard as one is not louder than the other and I am happy with that feedback as when I was editing the podcast, I wanted to make sure that both voices were hitting around 12-db to 6-db where it is not too low to hear but also not too loud that it is ear piercing. A critical response that I have been given is that I should conduct another podcast session but rather with someone who agrees that the gaming industry is biased towards women and do not portray a diverse image of women compared to how men are portrayed. I think this critical feedback is very helpful as it would allow me to have two different sides and opinions of the representation of women in video games however, I have already previously recorded a podcast session where I have spoken to a male that does not fully agree that the gaming industry does not have a variety or diverse portrayal of women and I have managed to record his intake and his opinions of why the gaming indsutry portray women in a particular way.

FEEDBACK FROM MY 1ST DRAFT OF MY BLOG ARTICLE:
As I had completed writing up my first draft of my blog article, I wanted to get some critical feedback on my work before I move on to writing my second draft as I wanted to know what is strong in my article so I know what I can keep in my article and what needs to be improved so that I could write a better second draft
and I can know how to perfect my article. I had asked not my supervisor but another teacher that specialises in film studies to read my first draft blog article and to give me some critical feedback and one of the feedback that I have been given is that my blog article is very lively when it comes to the writing style and the way it is written and that it will definitely will attract the teenagers/young adults community that are interested in feminism and that is exactly the audience I am targeting to hit for my online blog. Not only did I receive positive feedback but I had also received critical comments and advice on what else I should include on my article. An advice that I was given was to mention and name world leaders such as Donald Trump whom had openly made misogynistic remarks and how the media is not conducting any actions or challenging Trump to make a change and fight what Trump is saying. Moreover, I was advise to consider mentioning about Margaret Thatcher's position as being the first female Prime Minister of England and how it did not make a drastic change in feminism and female equality. I think involving the political side of sexism and feminism such as this Donald Trump and Margaret Thatcher issue will allow my audience to know how feminism is a difficult yet significant matter that is in need of a change however, it seems that world leaders are either making it worse or not making a change at al and this gives my audience the chance to think deeply on how they can make a change on modern day feminism and to make a change for the equality of men and women. I was also encouraged to mention more female directors such as Kathryn Bigelow whom has directed the film Hurtlocker and Zero Dark Thirty in which are films about war and battles but I should think about discussing how more female directors need to be employed to produce more feminine films as war films would be considered as "masculine films" however, there should be more films made that issue and portray the broader issues in the world. I should also contemplate on raising questions about what women could bring behind the camera and whether women see the film world differently as to men because this would be an interesting subject to mention to my readers as they can personally debate to themselves whether men and women both have different ways of producing a film and illustrating a message in the film. Moreover, women may have a different way of using the cinematic spaces and their using of cinematography and lighting as their way of directing and their way of seeing a film can be different to the way men direct and asking this question to my audience can allow them to spark their own opinions on this topic. These subjects were advised to me are really good to add on to my blog article as this would not only inform my readers about what is currently occurring with feminism and sexism but also, raising questions to my audience will allow them to make their own beliefs and judgements about feminism and the issues within feminism. Overall, the feedback I have received was very helpful and the advice I was given to also include in my article will improve my article and make it more better and interesting for my target audience and readers.
2ND AND FINAL DRAFT OF MY BLOG ARTICLE:
P R O M O T I O N A L V I D E O F O R
O N L I N E B L O G W I T H M O R P H I N G E F F E C T
IDEA INSPIRATIONS:


For the promotional video that I will be filming and creating, I will be using the Godley and Creme Cry and Micheal Jackson Black and White music video as my inspiration as these two music videos both share a similar edited effect and that is effect is called morphing. For my promotional video, I will be having a variety of different girls from different cultures with different skin tones, looks and backgrounds so that there is a diverse representation of women in my promotional video. I want there to be a diverse representation of women as this will allow my target audience and the views who are watching my promotional video to somehow relate to one of the female models I use for my video in appearance. In the video, I will be taking mid close up shots of each female participant, in a green screen background so that when I edit the footage on Adobe After Effects or Adobe Premiere so that instead of having a green background, I will edit it so that the background is a peachy pink colour as that is the theme of my online blog. Moreover, I want all the female models I will be using is to make a statement on they opinions about issues within feminism and film as they would be relatable for my FMP topic. The way I will edit the whole promotional video is to use both After Effects and Adobe Premiere and I will use the tools and effects in the editing programmes so that I will get a similar effect to morphing.
EXPERIMENTING ON AFTER EFFECTS USING THE LIQUIFYING AND WARPING TOOL:


I wanted to experiment on After Effects on how I can achieve the morphing faces special effects so that I will have an idea on how to edit my actual footage that I will use for my promotional video and I would like to get some experience on how to do this effect
before I edit my final video outcome. The very first thing I had done was find portraits of two people and I had chosen photos of Bella Hadid and Lana Del Rey from the internet, however, I had edit both the photos on Adobe Photoshop using the polygonal tool and the magic wand tool, highlighting the necessary background so that the ending result would be completely white. Moreover as both the photos of Lana Del Rey and Bella Hadid were different shots as one was a mid close up and one was a mid shot, I had used the crop tool to adjust each photo to become a close up shot and this will make it much easier for me to edit on to After effects. After I had manage fully edit both the portrait photos on Photoshop, I had created a new composition on After Effects for a duration of 15 seconds and I had adjusted the framing rate to 25 frames per second. Next, I had imported both images on After Effects and renamed each photo to "Face 1" and "Face 2" so that I will know which photo to edit. As the photos were still slightly different with their positioning and size, I had to rescale the size of the photos so that they slightly match but my aim was to attempt to get both the eyes of the models in the photo to match as much as possible. After I have adjusted the photos to almost fit each other, I highlight Face 1 and I had went to effects, distort and then used the "Liquify Tool". I had decreased the opacity of face 1 down to 50% and I begun using the Liquify Tool will allow me to warp any image and edit parts of the Face 1 image so that the characteristics I will edit will perfectly match with Face 2's facial features. I definitely had to be careful on how I edit the the face and the features within the face such as the eyes, nose and mouth as I had found it quite difficult to adjust them to fit similar to Face 2 but I managed to be more precise by decreasing the brush size. When I was happy with how I have edited Face 1, I had decreased the distortion percentage from 100% to 0% so that Face 1 was back to it's original image, I had also decreased the opacity of Face 1 after as this will allow me to edit Face 2. I did the very same steps as I did with face 1 in fitting the faces to fit with each other. After both images have been edited to fit each other perfectly, I needed to create the transition from one face to another and I did this by setting a key frame on Face 1's distortion percentage and I had set it on 100% at 0 second and on 1 second, I had changed the distortion percentage to 0% so that it goes from the edited distorted face to the original image of Bella Hadid. Now with Face 2, I had I had done the opposite of what I had done with face 1 and what I did was starting from 0 seconds, I had decreased the distortion percentage at 0% and once the arrow hits 1 second, I had increased the distortion percentage all the way up to 100% so that it transitions from the original photo to the distorted version of the image. In the end, the images should go from the original photo of Face 1 and face morph into the face of Face 2 in a warping transition. This is the kind of effect I wish to achieve for my promotional video however, in my promotional video, it will not be photos I will be editing but moving images/videos of females speaking and this will be more challenging and difficult to edit however, having experiment with editing faces morphing and transitioning form one another has helped me incredibly. I think that I did very well when it came to editing the face as that is what I was mostly worrying about when I was editing since I wanted their faces to morph very smoothly from one to another. Editing the face was very difficult for me as it was easy for me to make a mistake since the facial features had to be aligned with each other and it was easy to make a mistake in which I made quite a number of mistakes but I had decided to take my time with using the Liquifying tool to get a better result. One thing that I was not pleased with this experiment is how the hair of face 2 appears, it is not edited well as there are parts of the hair that have not been edited and are separated from the photo which looks very badly edited and I think that I should have taken my time with the hair as I did with the facial features because I should perfect everything in this animation rather than focusing more on one specific part of the the animation.
FOOTAGE AND AUDIO FOR PROMOTIONAL VIDEO:
With trying to film my female model, Jovita it had taken quite a few shots and attempts to achieve the perfect footage to use for my promotional video. It was quite time consuming as it took longer than I had expected for my model to learn her lines. I had taken quite a few shots where it was not very good and they were not strong pieces of footage as my model had kept laughing due to not remembering her lines which then resulted to my model moving around and changing her position in the frame, the footage on the right side is an example of how my model was finding it quite difficult to remember her lines and be serious on filming. I had to re-position my model, move the tripod around so that I get a good shot of my model and also refocus the camera on my model so that I get a good clear shot again. The footage on the left side is an example of the good footage of my female model, Jovita stating a fact about feminism in the film industry as she is positioned completely in the middle and I aimed for the subject to be placed right in the middle of the frame as this will allow my target audience to focus on her and give attention on what the subject is saying which is quite important. Moreover, the quality of the footage is high as the camera is utterly focused on her face, I did this by zooming straight into her eyes and adjusting the camera lense so that it will completely focus on her eyes which allow me to achieve a focused sharp look to the footage. It had taken quite a few takes to get this shot to be perfect as I had directed each female to memorise specific fact and statistic and it was quite difficult to get a perfect shot the first time however, I had managed to get this perfect shot where my model clearly states the fact and the audio is very clear to hear and there is no noisy ambient sound in the background which will be good for me to use when I edit this footage and audio on Adobe After effects and Premiere.
I did not like this specific footage that I had recorded as there are quite a few reasons why I will not use this for my final promotional video. One of the reasons why it is not a strong piece of footage is that the model that I was recording was not looking straight into the camera lense. My target for the footage i record is that all female models should look into the camera lense as this will allow my target audience to feel involved in the conversation and create a relationship between whom is on the screen and the individual that is watching the promotional video. Moreover, it took quite a while to achieve silence from the other room in which was making a lot of loud noises which the TASCAM audio recorder could pick up and it was difficult to have to wait for them to quieten down and attempt to quickly record my female model stating the fact. However, one good thing about the footage is that it is clear and sharp when it comes to the quality of the footage and this is the type of quality I should aim for the footage I film. Furthermore, another positive feature about the audio with Mariam is that she can be clearly heard on the audio therefore, for my promotional video, her audio will be clearly heard rather than hearing her voice and a toned down noisy background. I think this footage of Mariam is stronger than the other footage as in this footage, the TASCAM microphone is not in shot but with the other footage, it can be slightly seen at the bottom of the footage which is not good at all to use for my promotional video as this will allow my advertisement to not appear professional looking. However, this problem can be resolved and this can be done by being edited on Adobe Premiere by adjusting the size of the footage on the screen but a consequence of doing this is that the quality will decrease and more noise will be added on the footage. One thing I wish I could improve with these footages of Mariam is to direct her to smile more as smiling for a promotional video will allow my target audience to be more attracted in taking a lot into my online Candid Feminist blog as it will look more welcoming for the viewers and watchers of the video.
In this footage, I was finding it quite hard to film as there were quite a lot of noise coming from the room next door by other students and although I had attempted to resolve the noisy problem by requesting for the other students to toned down their voices for a few minutes, it still did not work therefore, I had to result to waiting for the right time where they are not too loud so that I may record myself which was not the best way as it was very time consuming, I would have been able to have more time recording other female models rather than taking around 10 minutes waiting for quiet to record myself. However, when it was finally quiet enough to record my own footage and audio for my promotional video, I think the middle part of this footage was the strongest as it was the part where I was able to mention my statistic of feminism loud and clearly into the microphone and what else I do like about my footage was my positioning: I was given enough head space just like all the other female models that I had recorded and being given enough head space will allow my editing the transitions from one female to another will be easier as we are all positioned very similarly and the transition will appear smoothly. One thing I would do to improve my footage is to place myself a little bit more in the middle as I am placed slightly more to the left side of the frame rather than straight in the middle and having me positioned in the middle will give me more power and attention from the viewers/audience.
GOOD
BAD
BOTH FOOTAGES HAVE PROS AND CONS
GOOD
GOOD
GOOD BUT NEEDS TO BE EDITED
Filming with my female friend, Kenya was very easy as it was very quick to film her as she had managed to memorise her statistic that I had given to her rapidly however, there were some bits on the first footage (footage on the left) that I must edit out as there were parts where she was not too serious and would get distracted and talk to her friend whom was in the background. The parts I will edit out on Adobe Premiere are the bits where she is speaking to her friend and swearing, I definitely must edit this out or else the footage looks very unprofessional and as she is saying some swear words, I will absolutely cut that bit out as I do not want my promotional video to have any violent language as I do not want my online blog to promote any verbal violence or language, both for my writing style on my articles, the language in my podcasts and also with my promotional video. However, when my model is serious on filming and recording, that part of the footage was very good and strong to use for my final promotional video as she looks right into the camera and clearly informs to the camera her given feminism statistic and what I really adore about her audio is that it sounds very informing to the viewers. With her footage and audio of her opinions of feminism, I think it will be really nice to involve this in my promotional video as this will inform my target audience and those whom watch the video what females personally think about modern day feminism and sharing our opinions will allow others to know what other's thoughts on a subject are, in this case feminism. Another strong aspect to both her footages is that she is placed directly in the middle of the frame and it looks very nice as she is given enough headspace and both these footage are the strongest out of all footages I have recorded because the visuals are exactly what I had wanted it to appear when it comes to positioning, framing and lighting. It was very easy to position this model as when I had directed them, they had stayed in position and followed my instructions on what to do hence why I had managed to produce good footage with this model.
FIRST EXPERIMENT
SECOND EXPERIMENT
EDITING GREEN SCREEN:


When I was filming for my promotional video, I had used a green screen as I wanted to experiment using the green screen to gain some experience on green screen editing and also, my original plan for my promotional video that I will post on my online Candid Feminist blog, I wanted to have the backdrop a peachy pink colour as this will follow the colour scheme of my blog. After I had completed filming the footage that I will use for my promotional video, I had begun editing the footage and audio using the editing platform, Adobe After Effects as this is the best editing platform in editing the green screen backdrop and achieving the face morphing and warping effect. In the process of editing the green screen, I had watched a couple of YouTube tutorials on how to edit the green screen and change the colour into another colour of my choice. At first, I had used the pen tool to create a mask around the subject/model within the frame and i had used the pen tool to outline the
areas where they are placed and places where they move. After, In the effects control panels, I have selected the effect called "Key Colour" effect and this effect allows me to both swatch a colour of my choice using the eyedropper tool to get rid of similar colours of the colour I have selected and in my case, I will use the key colour tool to select the colour of the green in the green screen backdrop. After detecting the green colour to rid of the green screen, I had to increase the colour tolerance so that I can get rid of the green screen but when editing and using this particular effect, I had to be careful not to increase the colour tolerance too much as occasionally, the colour tolerance may effect the the subject that I have outlined using the pen tool. I had used the Key Colour tool quite a few times for each footage I have recorded of the female models I used as one negative thing about this tool is that sometimes, it does not detect every pixel of the green screen and I must zoom in to get every remaining detail and pixel of the green screen. I think using this tool was very difficult to use and I have made a lot of mistakes using this effect as I would increase the colour tolerance too much and I would result to having some of the pixels on the model and the subject I do not want to effect removed and I would have to try find out how much colour tolerance will not effect the subject. However, I had managed to achieve ridding of as much remaining green screen pixels on the footage without affecting the subject however, in some of the footage that I have edited such as the footage of myself and Kenya's footage, in some areas of these footage, pixels of the green screen can still be visually seen and I have tried using as much Key Colour effects on both of the footage however, using increasing the colour tolerance anymore will affect the subjects within the frame and that is something I do not want to happen hence why I have left the small remaining green screen pixels. To further edit the subjects and to smooth out the edges of the subjects to achieve a smoother and softer effect with the green screen, I had searched on the effects control pane, for an effect called "KeyLight" and this effect allows me to key out pixels that have vibrant colours such as the green screen colour and this effect will make them appear as transparent as possible and it will help replace the green screen background. When I was using the KeyLight effect I had change the colour of the screen colour that will be effected and from using the eyedropper tool and zooming in very colour to find a green screen pixel, this had allowed to to get rid of any remaining green pixels as much as possible. I had changed the settings of the Screen Gain to 100.0 and the Screen Balance to 50.0.
Moreover, from being taught a few tricks form the technicians on how to achieve a better look when editing a green screen, increasing the Pre screen Blur to 5.8 allows the footage to have a tiny bit of blur around the masked subject and this will allow them to appear smoother when it comes to the edges of the subject selected. After that, editing the Screen Matte is another essential to achieving an improved appearance of the footage with green screens: I had changed the Clip Black settings to 13.0 and the Clip White to 68.0 so that there are no shadows and the screen area is completely black. I wanted to edit the footage a bit more to make the subject look more realistic behind a solid background colour, I had decreased the Screen Shrink/Grow down to -1.7 so that them lines around the edges of the subject that is masked looks more smoother rather than appearing quite harsh and visible. After editing the green screen and perfecting the footage so that it does not appear too unrealistic and fake, I had decided to choose what kind of back drop background I will have and I had come to the decision that I want a background that follows the colour scheme of my online Candid Feminist blog in which is a peachy pink colour. To make a new background, I had created a new layer using the Solid Tool and this allows me to create a new layer and I had picked the peachy pink colour. I had dragged this new peachy pink layer at the bottom so that it in the back rather than top of all the other layers that are meant to be on top. I did not really like how the solid background is fully peachy pink and I had come up with the idea of having a gradient effect rather white to peachy pink. To attain the gradient effect, on the effects control panel, there is an effect called 4-Colour Gradient and I had chosen different shades of the peachy pink and white so that there is a smooth yet gradual colour transition in the solid background.
O N L I N E M A G A Z I N E S P R E A D
S E L F P O R T R A I T S S H O T S F O R O N L I N E B L O G


This is a medium close up portrait shot of me, however, I will not be using this particular photo on my online blog due to the bad lighting in this shot, I did not set up any LED lights when this shot was taken and I had only used the natural lighting coming from the windows in which there was not enough natural light hitting me therefore, there are a lot of shadows in my face and the shot overall appears very dark and it may be quite difficult trying to identify myself for my target audience. I could have made this shot a lot more better if I had set up the LED lights and toned down the harshness of the LED lights so that I will achieve a softer look and a brighter look in this shot. Another critical feedback i would have to give this shot is that I should be placed in the middle of the frame as I am positioned slightly more towards the right side and the shot would have better stronger if I had been in the middle as this would represent that I am signficant and important as I am the owner and writer for my Candid Feminist online blog.
Although this is a nice candid medium close up shot of me with very good lighting that is allowing me to appear soft and not too harsh or over exposed however, this photo will not make an appearance on my online blog as because I am not looking directly into the camera and for the self portrait shots, I wanted the shots of me to be looking into the camera so that my target audience may have a relationship with me as the writer of this online blog and also to the atmosphere of my blog and the self portraits of myself will be seem and appear more welcoming and friendly if I am looking into the camera.
I really like this close up shot of myself as this is quite an odd shot however, I think this shot is very artistic and to me, this shot seems very friendly and almost playful as due to my positioning where I am coming from the right side rather than just being placed in the middle. I will be using this portrait photo for my online blog and another one of my reasons on why I have chosen this to be featured on my online blog is that the lighting is yet again very nice and soft and there are no shadows to be seen in the background compared to some of the other photos that I have taken, the shadow not being seen will allow the shot to have no other distractions and the target audience that I aiming for will only focus on the subject within the frame and that is me.
I honestly do not like this specific shot of me as the one main reason why i will not use this photo for my online blog is that the photo is not entirely focused on me and the photo is quite blurry which allows this shot to appear to be taken by an amateur hence why it is not professionally taken enough to be featured on my blog. Another negative feature I must say about the shot is that I do not like how the shot is a full medium shot of me, this shot loses my intentions to let my audience focus on my face rather than my whole body as the green sparkly top I am wearing in the photo may distract and divert their attentions else where and not on my face and this loses the closeness between my target audience and I.
1ST DRAFT OF MAGAZINE SPREAD ARTICLE:


2ND DRAFT OF MAGAZINE SPREAD ARTICLE:


PROCESS OF CREATING MAGAZINE ARTICLE: FONT EXPERIMENTATION


The first font is nice because it follows the conventions of what is expected from horror films as the font contains streaks at the edges of each letter like a paintbrush but also, the font allows all letters used to be in capital letters rather than a mix of both capital and lower case. this could possibly be used for my magazine article as my article mostly talks about the negative stereotype that horror films portray especially about
female characters and women in general. However, although this font follows the conventions of a horror film and could be used on a horror film poster, I will not be using this font for my final outcome of my magazine spread as it would be very cliche to use if my article is talking about horror films and it would not be very symbolic to use a font that is already envisioned in the themes of my article.
This font is nice because it is a simple sans serif font that is smooth in the edges and do not contain any strokes at the edges. and I prefer sans serif fonts as they are bold and solid compared to serif fonts because they are more readable for the readers and for my target audience, I want to make sure the fonts I use for my blog articles and my magazine spread to be easy and uncomplicated for my target audience to read any of my articles
that I post on my online blog. Another great thing about sans serif fonts is that they are easy to read from further distances and this will allow me to reach out to my target audience that may be short sighted and this will give more of a chance to reach out to most of my target audience. In addition, a great feature about sans serif is this will allow my audience to recognise the words in the article better as the font is more smooth and this will also allow my audience to intensify their abilities to read more rapidly and acknowledge the words in advance which may be handy therefore, I will be using sans serif fonts such as Arial and Helevtica throughout my Candid Feminist online blog.

MORE EXPERIMENTS ON FONTS:
I wanted to continue experimenting on the fonts that I have downloaded and I downloaded the font from the font website called DaFont called "Ancherr" which is a font that would usually be used in horror film posters. I used the photo editing platform adobe Photoshop to experiment on this font and what I wanted to achieve was getting a black and bloody red colour gradient effect on the font. I did this by clicking on the text on the layers and this would have led to me the Layer Style so that I can further edit this specific text. I had went on the Gradient Overlay so that I can add a gradient colour effect on the text and I had selected two colours form the Colour Picker wheel and I choose to use black and a bloody red colour to recreate a text that would normally be featured on a horror movie poster. I had adjusted the positions of the smoothness and the positions of the stops on the gradient so that I could achieve a look where the red begins from the bottom of the text and only takes up 1/4 of the text whilst the colour black takes up 3/4 of the text and begins from the top and this will allow the text and the font to have dripping blood.

MAKING MY ONLINE MAGAZINE SPREAD:


In creating my online magazine spread, I wanted to make sure that the theme of my magazine spread was very similar and will look very similar to my online Candid Feminist blog. What I had done was used the eyedropper tool on Adobe Photoshop to detect the very same peachy pink colour that was used in my Candid Feminist blog so that I could use the peachy
pink colour as the main background on my magazine spread. As I have created a logo for my Candid Feminist online blog, I wanted to have the exact same logo on my magazine spread so that my target audience may identify this online magazine spread as a part of my Candid Feminist blog and the appearances of both will be very distinctive and my target audience will know that they are both run and created by the same creator. I used the Elliptical Marquee Tool on Photoshop to achieve the oval shape on my logo and I had made sure that the colour fill of this oval shape was white. However, I did not really like the appearance of the oval shape and it's harshness on the colour white therefore, I had decreased the opacity of the oval shape down to 70% so that it is not too harsh and it is more opaque. I could not find the very same fonts I had used for my logo sadly therefore, to overcome this problem, I had resulted to looking for a font that similarly looks similar to the font on my Candid Feminist blog. Moreover, on my Candid Feminist blog, I had used black rectangular squares as to place text in and I wanted to follow that very same theme for my magazine spread and I had achieved this look by using the Rectangular Marquee Tool and filling in the shape in the colour black.


After I had edited in my Candid Feminist logo and adding my main title of my magazine spread article and the author's credits, I had begun adding in the magazine article that I have
written on word. As this is only the first page of my magazine spread, I am only adding one paragraph and a tiny bit of my second paragraph in as I cannot fit my whole article in the first page. From looking at other magazine spreads and researching on how the layout of magazine spreads are, I had noticed that some magazine spreads text are very thin and long and I wanted to follow this kind of text layout for my own magazine spread so that my magazine spread will appear more like a mainstream magazine. Moreover, in creating the first page, I had to look for a good sans serif font that I could use for my whole body text article however, it was quite difficult looking for a good sans serif font that looks sophisticated but also not too childish and not too simple and plain. I had went on the Dafont.com website to search for a good simple effect and I had come across a font called
"Gnuolane" and this font is similarly looking to 19th century grotesque fonts. I wanted the first page to be very simple and minimalistic as I did not want the first page to be overfill with titles, logos, too much text and too many photos as this may intimidate my target audience and throw them off reading my magazine spread article.

This is a very good image to use for my self portraits on my Candid Feminist online blog and the reason on to why I will be using this specific photo is because this is a close up shot of my face and this will allow my target audience or those whom are viewing my online blog to know who I am and to focus mainly on my face to acknowledge the blog owner. Moreover, another positive feature about this portrait photo is that this shot is particularly not too overexposed to the point where some features of my face are missing due to too much lights and it makes the subject within the frame look very harsh. I think the lighting for this shot is perfect as I appear very illuminated and bright and this will seem and look very welcoming to my target audience.
N E W L A Y O U T F O R O N L I N E B L O G
PROCESS OF CREATING HOMEPAGE LOGO:


PROCESS OF CREATING LINKED BUTTONS:


As I am not content or pleased with how my online blog is looking, I had decided to change the layout of my whole blog entirely and completely because I do not like the colour scheme of using a peachy pink colour on my online blog site as I feel as if the colour may allow my target audience to believe that the colour pink is feminine and will only attract women and not men however, my blog is about feminism and I am targeting not only women but also men because feminism is about equality of both men and women, socially and politically. I also do not like how the layout of my products are such as my article and podcast as it's not a very unique way of laying out these outcomes on my online blog and I personally feel as if my blog looks and appears very boring and this will not attract my target audience, in my opinion. Moreover, the layout of my Candid Feminist blog site is a theme that I have chosen from Wix's suggested layout themes and I begun seeing how the layout is no longer working out and it looks like an ordinary cliche blog site and that is not what I want my online blog site to appear like. I want my blog's layout and theme to be distinctive and eccentric compared to other online blogs that you see online and that is not what I would call my online blog currently therefore, I had come to the decision to change my whole blog completely from scratch and create the buttons myself so that I can personally create my own lay out rather than using a suggested theme from Wix's suggestions. Moreover, I was also not fond of how I had edited my magazine spread as it looks incredibly similar to my online blog layout and there is no creativity at all in this magazine spread, therefore, i will be changing the magazine spread compeltely and it will not look similar to my new online blog layout but it will be completely different when it comes to the colour scheme, the theme and the writing style.
As I am changing the layout of my online Candid Feminist blog, I wanted my blog's layout to be quite odd and quirky. For my new online blog, I will be creating buttons with unusual typography that will lead my target audience that are viewing my online blog site to the article, podcast or promotional video using the editing platform, Adobe Photoshop. I had begun creating my homepage button for my new layout of my online blog and I wanted my homepage button to look very similar to my previous Candid Feminist logo but I had adjusted the logo a little bit more and made a few changes such as adding shadowing effect on the circle and I did this by picking a peachy pink colour and using the Elliptical Marquee Tool to create the circular shape, after this, I had then created another circular shape but I had filled this shape with a lighter peachy pink tone colour and placed this on top of the dark peachy pink circle shape so that there will be an illusion of a shadow and this will also allow the shape to appear Three Dimensional. With the choice of fonts I had decided to use, I had made it quite
similar to my previous Candid feminist logo too however, I had changed the specific font that were used to new fonts I had downloaded on Dafont.com: I chose to download the font "Lemon/Milk" for the "The" of my blog name as I wanted a simple, bold and capital sans serif font so that it can promote power since "the" is a stronger word rather than "a". I had downloaded the font "Voice of the Highlander" for the "Candid Feminist" in which is the most important part of the blog name because I think having a curly calligraphy font as it appears to be hand written and this would allow my home button to have a personal touch and it also looks as if if it personally written towards my target audience. Not only that but Calligraphy fonts are more appealing to the human eye and it is attractive if it is compared to sans serif simple fonts such as Arial and this will allow my target audience to be curious on what is written and this will allow my target audience who are reading my online blog to memorise the blog name more rapidly due to their curiousity.
As I will be creating typography to be a part of the buttons on my online blog, I had begun creating the button for my article in which I named "SEXISM IN THE FILM
INDUSTRY". With my buttons, I wanted to use polaroid boarders to be the background for the typography I create rather than having just a coloured background as this will allow my online blog to have a slight vintage theme due to the polaroids and also be quirky and unusual due to the odd typography that I will create and place in the polaroid. I still decided to use Adobe Photoshop in creating this button for my homepage and what I had done is researched for a polaroid boarder online on Google and I had chosen the most realistic one that is not cartoonish and a polaroid boarder that has scales on the boarder so that this increases the realism of the boarder. With choosing a good font for this button, I wanted to choose a font that is capitalised and very bold because the title of my article is very straightforward and I think a bold font would match and pair up quite nicely with the title. I had searched on DaFont.com to find a good font on the Sans Serif section as this is the section where I will be able to find a good yet simple font without no strokes at the edges. I found a font that matches the features I am searching for perfectly and the font is called "The Bold Font". In Photoshop, I had separated each word in the title in separate layers so that I can be specific when I am editing the positioning of each word and the size of each word. For this button, I want to experiment the sizes of each words that are in the title and also change the way they are positioned. With the word "SEXISM" I had made sure that I made this particular word the largest when it comes to size as it is a significant word in the title since that is the issue that I am discussing in my article. Moreover, I had coloured the word "SEXISM" in a bright red colour because the colour red represents anger and because sexism is a gender discrimination and prejudice towards men and women and the red is meant to be subliminally symbolising anger. I had also decided to turn the word "film" sideways as I wanted to appearance of this typography to look very odd yet very cool looking and also keeping the rest of the words the colour white will allow the word "SEXISM" to become more noticeable for my target audience and this is what I am intending for because I want the word "SEXISM" to be the word that they see the most. After I had completed my typography, I had imported the photograph of the polaroid boarder on the page of my typography and I had made sure that the layer of the polaroid boarder is under the typography so that the typography will be placed on top and will be visible rather than hidden. However, later, I had come up with the idea of creating a drop shadow on the word "SEXISM" to have a Three dimensional appearance to the word and also make it look more realistic. I did this by duplicating the "SEXISM" layer and placed it behind the first "SEXISM" layer and what I had done after is that I had changed the colour fill of the duplicated layer into a darker red colour and this had allowed the word to have a darker shadow in the background.


In the process of creating another button for my homepage, I had researched typography online as part of my research as I wanted to have more knowledge on how to create quirky typography and I had come across an app that I can download from the Apple App Store called "Typorama" and this app allows their users to create attractive visual typography and they have a variety of different typography styles and layouts. I begun using and experimenting on this app in order to create my typography for my home page buttons and I really liked the type of fonts this app had offered and the way they are stylize and positioned

and therefore, I had concluded to myself that I would use this app in aiding me to create and produce some of my buttons whilst I used Adobe Photoshop as a back up to create my buttons for my online blog. I had used two different fonts and two different styles/positioning of text as I wanted to take two very different typography visuals and combine them together so that I can edit them on Photoshop and position them in the way I wish to. I choose to use to use a script font for half of my text and the other half of my text to be a simple sans serif bold font because I like the difference and the contrast between the two fonts and they compliment each other very well. Moreover, using the "Paintbrush" typography as a part of my button as I really like how the brush strokes look like with the letterings and it doesn't look plain at all. As I wanted the polaroid background to be the colour black again, I had to edit the typography that I have created and exported from Typorama on Photoshop and for my design, I had used the Magic Wand Tool and select the letterings of "DISCUSSION OF FEMINISM IN" in the colour white so that the text can be visible on top of the black ground on the polaroid boarder however, with the word "DISNEY" I wanted to colour fill this word with a colour that relates to the colours of Disney therefore, I researched online the colours of Disney however, it was not as helpful as they had many colours therefore, I had resulted to researching the disney logo in which is a light navy blue colour and I had used the Eye Dropper Tool to select the specific colour of the blue I wanted. After this, I used the Magic Wand Tool to select the letters in the word "DISNEY" and used the Paintbrush tool on Photoshop to colour in the selected letters in the Disney blue colour. In my previous buttons that I had created, I came up with the idea of having a drop shadow behind the important words therefore, I had decided that I will continue this theme of having a shadow behind the words that are significant and coloured to add a little more detail on the typography. With the "BOND FRANCHISE" I had colour filled this with a grey colour because from researching James Bond franchise online on Google, colour scheme was very limited and the colour grey was very prominent in all the photos I had seen therefore, I had concluded to use the colour grey for the "BOND FRANCHISE" part of my typography. I had also add a drop shadow in this part of the typography as this text is coloured in, I wanted to continue following the theme of having the drop shadow behind the coloured texts.


As I have been experimenting on the app, Typorama, I had decided to create another home page button using the typography that are featured on Typorama as I think that their fonts and styles are really quirky and this is the type that I am looking for. On Typorama, I had chosen to type out "WHY I AM A" and see what fonts I may like to use, from searching around, I had chosen the Fast Runner text style as it is in fully capitals and also, it is slightly italic and slanted to the right side and I think that having a bold font will allow the text to appear emphasised and this is distinguishing the text as it is important. Moreover, I had also used Typorama to look for a text style for the word "BADASS". With this word, I think it is
the most important to highlight in this button as I want my target audience to focus on this main word. I used the text style called "The Old Northern People" on Typorama and the reason why I had chosen this text style is because it is fully in capitals which will allow the text to be very eye catching due it's boldness. Moreover, the thickness of the letters is quite thick and this also emphasizes the word and it makes it very easy to read for the readers due to it's large size and thickness. I had decided to colour fill the word "BADASS" in red because it can symbolically represent strength and determination and I think these two words fit in the theme of being a "Badass" hence why I used the colour red to fill the text. Yet again with following the theme of having a drop shadow, I did the very same steps as before, duplicating the layer of "Bad" and "Ass" and placing them under the original "BADASS" and filling them in a darker red colour to making the shadow look more realistic. Moreover, I did not like the idea of having another home page button that has a white or black background on the polaroid boarder as I think that it may look and become quite repetitive therefore, I had researched on things that may relate to the word "Badass" but I was not successful in finding anything that is inspiring, therefore, I had thought to myself what I first think of when I say the word "Badass", the first thing that had popped into my mind was the film "Kickass" and I had looked into the images for the movie posters of this film. I found a poster in which has bright colours such as yellow, green, purple and red. I did not want to use all of these colours as it would like very messy on my button therefore, I had decided to use the colours of yellow and red as I think these colours will allow my button to appear more comic like which is the look I am going for in this button for my online blog. I used the Eye Dropper tool to select the specific shade of yellow that was used in the movie poster so that I could used the paintbrush tool to paint over the original black background on the polaroid boarder.


Since I had written an article about how movies and films in Hollywood especially the horror genre portray negative stereotypes of gender roles, I wanted to create a button for my online blog so that my target audience may be able to access this article. At first, I had researched horror movie posters so that I can find some inspiration on how my button will look like and I had come up with the idea of having the theme of black, white and red again for my button as I had previously used this colour theme on another button I had created for sexism in the Film Industry. However, I was still unsure on what kind of font and what kind of text style and positioning I want the text to appear like however, I had found inspiration from Stanley Kubrick's The Shining movie poster, I think that the font that they had used is very distinctive and the audience will clearly know that this font belongs to The Shining poster and for my own button that I will make, I did not want to use the stereotypical horror font that appears very distressed and blood dripping down on the letterings but I wanted to use a font that is subliminally related to the subject of horror. I have chosen to make the whole sentence apart from the word "Horror" in the font that was used in The Shining as I did not want the word "Horror" and the font that was used in a horror film to be combined as this would be too obvious and evident to my target audience which I do not want hence why I had used a simple sans serif font called "The Bold Font" from DaFont.com for the word "Horror" and this will allow my audience to be able to read the word more easily and quicker as it is a straightforward and uncomplicated font to read compared to calligraphy fonts. The typography in this button is very contrast with the meaning behind why I used these fonts on which words as I think using a font that is the complete opposite of it's meaning is quite artistic in a contrast way. Not only have I did this with the fonts, but I had also did the same with the choice of colours I used in the words: Usually, the word "Horror" is associated with the colour red to signify blood however, I chose to colour fill the word in white and the words "are Films sexist?" in a bloody red colour as I wanted to yet again portray the meanings oppositely since this would allow the target audience I am aiming towards to think about what is words in the button is important and significant to read. I positioned the sentence quite oddly: I wanted the first three words of the sentence to ascend going downwards and I wanted the word "Sexist" to all of a suddenly be placed back in the middle of the button as the word "sexist" is an important word to read. With the red colour, I had taken a photo of The Shining poster from online and used the Eye Dropper tool yet again to select the same red colour that was used in the poster and filled in the words "Are Films Sexist?" in red. No surprise, I am still following the drop shadow theme and I did the same routine I have done previously to the other buttons I have produced before. I think that the button appears very vintage horror looking due to The Shining font and the positioning I have chosen for each word works very well altogether for the button.


From thinking about my main home page button which will allow my target audience to be brought back to the home page of my online blog, I need to make my home page button to be very bright, eye catching and attractive to my audience and I did not think that the peachy pink colour was doing a great job in attracting the human eye hence why I had decided to change the colour of the circular shape in to a bright colour and I had chosen to use a brightening and happy colour, yellow. I think that the colour yellow can relate to my topic of feminism because yellow to me represents happiness, optimism and positivity and for my blog, I want the atmosphere of my blog to seem very happy and be sanguine in hopes of achieving equality between men and women. Moreover, I want my blog to promote positivity for men and women hence why the colour yellow may be a good colour to use for my home page button for my online Candid Feminist blog.


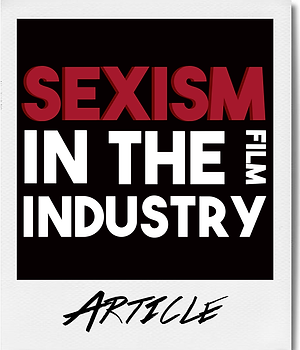

W H A T M A K E S M E A B A D A S S P A G E


I had taken this photo of my sister using only the natural light that is coming from the window and I think that the shot looks very nice as you can clearly see her face and there are not as much shadows as I had expected to have considering I am using natural lighting from the sun and the only shadows are in places where my audience should not be looking at such as her neck but her face is bright in the photo which is what I am aiming for.
With this photo of myself, I had also used natural lighting coming from the sun and the window and I think that this shot could be improved as there are a number of shadows on my face especially at the top of my head and the bottom of my face has shadows that are not wanted hence I could improve this shot by using LED lights or a gold reflector to make my face more brighter and this will no shadows to appear on my face.
I have taken photos of my friend Wura but this time around, I had decided to use better lighting equipment to take these photos as I wanted the quality of the photos that will be used in my "Why I Am A Badass" page to be good and high quality photos therefore, I had used one LED light and also a gold reflector so that I will be able achieve a shot that is clearer but also brighter so that this can more welcoming and friendly to my target audience whom are looking at the photos in my gallery. In the shot to the left, there are still quite a lot of shadows especially on the right side of her face and it is not as bright as I wanted it to be compared to the photo of Wura on the right where there are no harsh shadows that can be visibly seen and it is more brighter. The photo on the left side also seems quite harsh when it comes to the lighting, this is due to the placement of the LED light on the gold reflector and it was focused too much on the left side of her face and the right side of her face did not receive enough lighting in which had resulted to the right side having a lot of shadows. Between the two photos, I will be using the one on the right side as it is more better when it comes to the lighting and the placement of the model within the frame.
BEHIND THE SCENES OF PHOTOSHOOTS:


EDITING PHOTOGRAPHS ON POLAROIDS:


In the process of editing the photos I have taken to be used for the polaroid gallery in my "Why I Am A Badass" page, I used Adobe Photoshop as the editing platform because I have more experience on Photoshop from the past Digital Media projects that I have done and also, Photoshop is better than using Illustrator as Photoshop particularly edits photographs whilst Illustrator creates images or digital drawings. At first, I had imported the same polaroid boarder I have previously used in making my homepage buttons for my online blog site, so that the theme of polaroids in my online blog is continuous rather than having using different polaroid boarders and it will make my online blog site's appearance quite messy. As the background of the location where I will be pasting the photo of the models in is a black background, I wanted to change the colour into a colour where it will match the background of the photographs of my models therefore, I had used the Eye Dropper Tool on Photoshop to select the specific colour of the background in the photos so that it will match, then I used the Paintbrush tool to colour in the black background into the new colour. After I have imported the polaroid boarder and edited it on to Photoshop, I had import the strong and good photos I have taken of myself and other female models/friends on Photoshop and used the Rectangular Marquee Tool to select only the model within the frame and not the unwanted background and I had pasted them on the polaroid boarder and resized the photo of the female
models to fit into the polaroid boarder. I had thought of the idea to make the photos look more vintage by adding an overlay of dust and noise on the photographs. To be able to achieve this vintage appearance, I had researched online for dust/noise overlays to download and onceI had found a good link, I had dragged the dust/noise overlay PNG file on Photoshop and paced them on top of the photographs of the models layer so that they will be placed on top to make the photograph appear olden. I did not like how harsh the noise/dust particles appeared on the photos therefore, I had selected the layer of the dust/noise particles and decreases the opacity from 100% down to 30% so that the noise/dust particles are not too harsh and are slightly visible as usually, olden photos contain a tiny bit of dusts particles and they are very subtle. As part of my photoshoot, I asked my models "What makes you a badass?" and record their answers to my question, I wanted to use their answers as captions for each of their polaroid photos on the gallery. Firstly, I wanted to find a good handwritten font that I can use for their caption and I had searched on DaFont.com on the calligraphy/handwritten section of the themes and I had found a font called "Antro Voctra" which appears handwritten, almost as if it is written by a person from a high status and I really liked the appearance of it due to it's realism in the way the font appears. Downloading the font, I had written their statements and answers below using the Antro Voctra font and placed it in aligment below the photograph.


FINAL PRODUCTS OF THE BANNER TITLES:


FINAL POLAROID BUTTONS FOR ONLINE BLOG:

I had decided to create banner titles for each outcome page on my online blog site so that the pages do not appear too plain or simple and I think creating these banners will make the site look more physically appealing and attractive towards my target audience. I made all these banners down below using the editing platform, Adobe Photoshop yet again and the first step I did in creating these banners was to look for a banner boarder online and I had found a simple yet quirky banner and dragged that photo on Photoshop. The photo had watermarks on them and I had to edit the
watermarks out by using the magic wand tool by selecting the unwanted watermarks and I then using the paintbrush tool to draw over it using black or white depending what colour will rid of the watermarks. After this, I had used the eye dropper tool and selected the very same yellow I had used in the polaroid button of my "Why I Am A Badass" page so that the colours of the button and the banner title will look similar and the colour theme is continuous and coloured the inside of my banner title. Moreover, opening the PSD file of my polaroid button on to Photoshop, I had duplicated the layers of my typography and the shadows of my typography so that I have the exact same typography on both my button and my banner title, however, the only changes I have made on my banner title compared to my button is the positioning of the text and typography as the space within the banner title is quite limited and narrow and what I had done to achieve a look without the typography looking too squashed together is that I had decreased the size of the "Why I Am A" text and increased the size of the word "BADASS" as this is the word I wanted my target audience to give their attention to this significant word. With the other title bannersI have created below, I had repeated these simple steps in creating them however, the only banner title I had made changes in the appearance is the podcast banner on the discussion of feminism and what I had done is use the navy blue colour of the word "Disney" and used this colour as the background fore colour rather than black and changed the colour of the word "Disney" in black so that the only colour of blue is prominently seen on the banner title.
I really liked how this photo had turned out as the female model looks very bright and her facial expressions portray that she is very content and joyful which is what I want my models to look like for these photos as my polaroid photos of these female models are meant to represent what makes them a badass and that they are happy about being a badass woman. One thing I would improve is I should have changed the positioning of the LED light on the gold reflector as one side of her face is receiving too much gold light and the other side of her face has shadows and her whole face cannot be seen properly when it comes to the lighting.
I too really like my model's facial expression as she looks very cheerful with her smile and I also really like how the image is clear and it is not blurry at all so that is something to be proud of when taking these photographs. I also like how it is not overexposed and also the lighting is not too harsh because the type of photographs I aiming to achieve is a clear image of the model but there is no shallow depth of field because as I want the images to look quite olden, the photo should be simplistic and I had made sure that the photo contains good lighting, the focus is on point and also the positioning of the model within the frame are placed in the middle so that my target audience will focus on them.
These photos are behind the scenes photos that my peers had taken of me when I was conducting the photoshoot for my "Why I Am A Badass" polaroid photos. During the photoshoot, I had to function the DSLR camera myself whilst also attempting to position the gold reflector in a position where it look pleasing on the model. as I could not operate all the equipment myself and I was finding it quite difficult to operate both the camera and the gold reflector already, my model had given me a hand in holding the LED light for me and I was giving my model directions on where and how to hold the LED Light so that I could figure out where the light will hit the model best to achieve good lighting for the photographs I will be taking.
I N T E R V I E W I N G F E M I N I S T A C T I V I S T S P E A K E R S


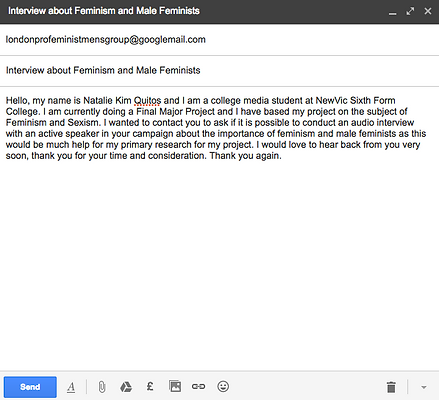
I had emailed a variety of movements and feminist activist speakers if they are willing to participate in an audio interview that I will conduct for my primary research. I wanted to email different types of people that are active in fighting against sexism or promoting feminism and I have emailed feminists that focus their seminars/talks in violence against women, feminists that have experienced sexism and I have also emailed a movement that consist of male feminists that are using their movement to deter male sexism from occurring and also promoting equality between male and females. Having a variety of different people but have the subject of feminism in common will allow me to achieve different stories and experiences that they have all undergone, moreover, getting their responses will allow me to see the different views they have about the issues of feminism and sexism.
I am currently in the process of editing and completing my promotional video of my online The Candid Feminist blog and I will upload the promotional video on to Youtube so that my target audience may be able to view the video and I had been inspired by the YouTube logo in creating this button for my promotional video. I had imported the same polaroid boarder I had used in the previous buttons on to Adobe Photoshop and what I had done is I had used the eye dropper Tool to select the specific red that YouTube uses in their logo. After I had used the Rectangular Marquee Tool to select the box within the polaroid and then used the paintbrush tool to colour in the box with the YouTube red colour. Using the red colour that YouTube uses will allow my target audience to recognise that the button is going to be related to a video, since my target audience is aiming mainly towards teenagers and young adults, their age groups are socially aware of this social media platform because our generation is very technology and social media based. I had taken a simple triangle shape from the internet and imported it on Photoshop and what I have done to achieve the YouTube play button appearance is I had CMD-T the triangle shape and I had rotated the shape 90 degrees clockwise so that the pointed part of the triangle is facing to the right side which has resulted in the triangle looking very similar to the play button on YouTube. I had also used the Magic Wand Tool to select the triangle shape and used the paintbrush tool to fill in this triangle in the colour white. I have also done the very same to which I had done in all my buttons and I had captioned this button using the "Colours Of Autumn" font to type out "Promotional video" as the caption below on the polaroid.
B A N N E R T I T L E S


I wanted to create one more button for my online blog as it seemed as if one more button is missing as there is a huge space at the very top of the home page buttons, therefore, I had come up with the idea of writing an
article in which I review films that have the theme of feminism. I had begun researching online and images of films and I had come across this 10 Things I Hate About You movie poster and I really adored the aesthetic theme and the colour that were used in the title and as this film is based on a female protagonist that is a female and has her own independent beliefs, I had decided to call this page of my online blog "10 Things I Love About These Feminist Films" which had then inspired me and influenced me to have a particular look in this button. At first, I wanted to use the vintage peachy red colour that was used in the movie poster title and I had gotten this same colour by using the Eye Dropper tool and coloured in the box within the polaroid boarder. With the typography, I did not want to go on DaFont.com to look for a font but instead, I had retreated to using the app, Typorama again to look for more text styles and layouts to use for this button. I particular liked how the text style "The Building Blocks Of The Universe" look when I had written "10 Things I Love About". What I am intending to do is using a sans serif font and then a serif font so that there are two completely different types of fonts, one being very simple and the other font being quite complex and handwritten. The other text style I have chosen to use for the "These Feminist Films" text is a text style called "Bonjour". Although they are both different in their appearance, I think they both compliment each other very well and their differences are what make both these typography together very unique and appealing. I had then exported the typography I had created on the app into a PNG file and imported them on Photoshop to edit them. With the "These Feminist films" text, I wanted to keep it the same with the text being filled
with the colour black however, with the "10 Things I Love About" text, I wanted to change the colour into the colour white and I had done this by selecting each and every letter in the text using the Magic Wand Tool then painting them with the colour white using the paintbrush tool. I had copied and pasted both the typography on the polaroid boarder with the peachy red background and I had rearranged the positioning to the way I had wanted them to be positioned for this button however, I wanted to create a shadow in one of the typography as I still wanted to follow the theme of shadows and the Three Dimensional look to the text. I duplicated the "10 Things I Love About" text however, this time I had selected all the letters and filled them in a light grey colour to act as the shadow in the background of the text and I had made sure that the light grey text layer was placed underneath the white text layer so that the appearance will look 3D. I think the finishing product's aesthetics looks very vintage and a bit olden which I really adore and I am very content with how this finishing button product looks like.
F I L M R E V I E W S / A R T I C L E S


FIRST DRAFT:
SECOND DRAFT:


FEEDBACK ABOUT FIRST DRAFT:
I had finished writing my first draft of my film review article for my online blog however, once I had finished this first draft, I was not as content with it hence why I had decided to get some feedback from my peers. One of the feedback I had received is to change the way I had concluded the film review article as it did not feel to my peers as if it had ended the way it should end and it was not a good ending for the article. Using this critical feedback from my peers, I had decided to find a better way of ending my article and I will state my own opinions about the feminist films that I have discussed in my article and why I look up to these films so that my target audience may get an insight of why I have chosen these films to talk about in this film review and as these feminist films mean quite a lot to me due my childhood and personal feminist beliefs, stating my thoughts about these films will be a great ending as it is something personal and the target audience will feel more welcomed in the blog and by the writer of the article. Another critical feedback that I had been given is to talk about more interesting facts about the films as my peers said that they take an interest in knowing what else is interesting about the films and what makes them a great film apart from the feminist subliminal messages they re sending as some may like a film to also be visually interesting along with the narrative of a film to be intriguing therefore, I will take this feedback and use it to improve my article by adding little facts that I really enjoyed about each film whether it is the actors/actresses, the mise en scene or whether it is the way the film gives me particular feelings as this may interest my target audience to know.
As I am creating a short film for my FMP as my moving image outcome, I had begun researching on how to make a film look more cinematic and I had also watched a few short films as part of my research and from watching these short films online, I had noticed with the short films I really liked that the depth of field were focused on particular objects in the frame such as a character in the film or an object and I really liked the appearance of having a shallow depth of field hence I had decided to experiment using the Canon 700D DSLR cameras and do some test shots as part of my practice before I professionally film for my short film. I had researched before hand on how to achieve the shallow depth of field look and form my notes, I must adjust the settings of the aperture and make sure the F-Number is larger so that the background is more blurry and this can allow me to focus on the object/subject in the frame and that is what I have done in the videos above andI ma really pleased with what I have achieved as the shot has a shallow depth of field but also, the camera settings are perfect as the shot is not over exposed at all and the shot is sharply focused on the subject within the frame. I will be definitely changing the kind of depth of field through my shots in my short film as I want the shots I take for my short film to be diverse and I want as much different shots in my short film as possible so that the shots are not repetitive.
I had taken a lot of inspiration from stylized short films I have been watching on shortoftheweek.com and I had watched many films that had different styles of cinematography, lighting, narrative etc and I had become inspired to not just rely on the narrative and the script of my short film but also the visuals as visuals are what captivate the audience too. Therefore, I had decided that I want to used lighting as my main source to imply subliminal symbols or messages for my target audience to notice in my short film and what I am planning on doing is using coloured lighting in particular. I wanted to use blue lighting to portray emotions such as sadness, regret, confusion, uncertainty or ignorance and red lighting may represent a different emotions such as anger, love, passion and strength. I think that lighting is definitely a good way for my audience to know how a character is particularly feeling although the characters in my short film do not directly say it. What I have done is I had conducted a shoot to do using
equipment from college and I had booked to use LED lights, colour gel and a Canon DSLR 700D camera and I had set up the equipment to how I want to. At first, I wanted to use the blue colour gel and I attached the colour gel on one of the LED lights I have booked and left the other LED light so that the shot is not too blue and I can use this light to adjust the lighting so that shot is not too dark or not to overexposed. I had directed my models to have a unhappy body language and facial expression so that my shot looks quite saddening and I am really happy with how my shots using the blue colour gels had turned out as they look very miserable and my models did not have to speak or say anything in the shot and this is exactly what I wanted for my short film and I think that I have achieved the look that I was going for in this shoot. However, if I had to change to improve the shots I have taken, I should try to not get the shadow of the model in the background as it is not necessary to have the shadow but it also ruins the shot as it may be considered as distracting.
I had also used the red colour gels however, using the red colour gels were quite difficult for me as the shots I had taken were far too red and it was difficult to decrease the intensity of the red colour in the shot however, I had tried really hard by using the remaining LED light and trying to focus more light on the subject so the subject odes not appear too red and it still did not look as great. I think I should have researched on how to use the red colour gels or the colour gels in general before I had conducted the shoot so that I have knowledge on how to work them so that I could have come out with better shots which is a lesson learnt for me.
F I N A L P R O D U C T :
T H E C A N D I D F E M I N I S T
O N L I N E B L O G
LINK TO THE CANDID FEMINIST BLOG:


